Table of Contents
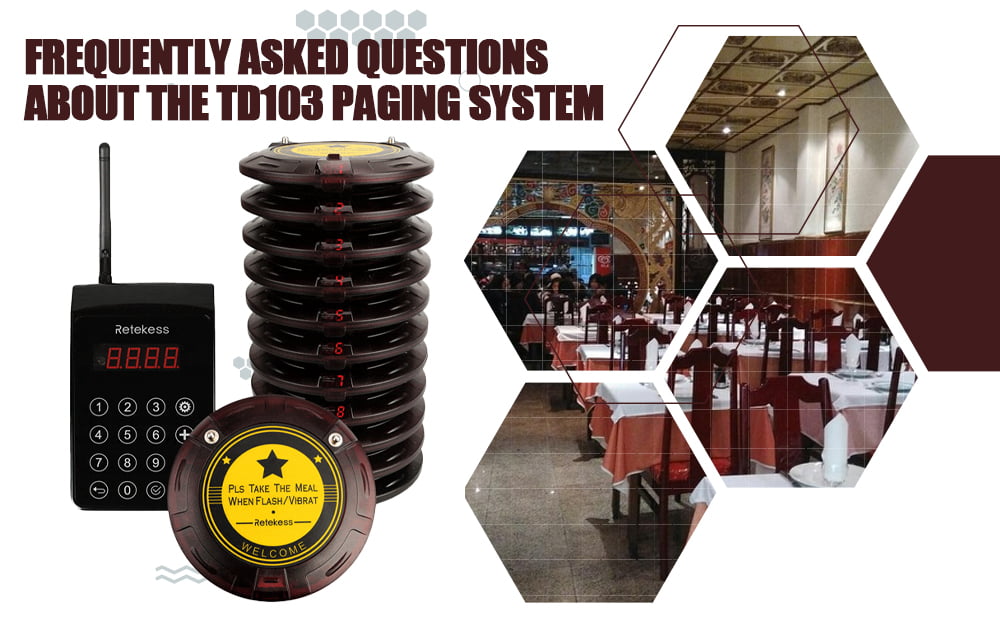
Frequently Asked Questions About the TD103 Customer Pager System
- Nancy
- Aug 11, 2025
We have sorted out the frequently asked questions and answers about the TD103 customer pager system to make it easier for everyone to know how to use the TD103 paging system.
1. How to set customer pager ID?/How to pair customer pager? /How to add additional customer pager?
Setting ID for Customer Pager (F1)
After the access to F1 function interface, input two-digit ID (Not input “99”) for your Pager and press CALL button. At the moment, the keypad display blinks. Place the Pager to an area approximately 10cm right above infrared commu- nication device of the keypad. If there are Buzzer and LED Flash from the Pager, it means that you finally make it. (Also, you can set it up in any time after you take the Pager off the charging tray.)
Notice: After the change of any parameter in the setting of the keypad, it is necessary to reset a new ID number if you want to apply the new setting to the Pager.
You can also refer to the video in the link below.
https://www.youtube.com/watch?v=mlMTJ68nnIc
2. How to set reminder mode?
Setting LED Flash Mode for Customer Pager (F2)
After the access to F2 function interface, the display shows the current LED Flash mode and you can select your desired mode:
0: OFF; 1: SLOW; 2: NEUTRAL; 3: FAST.
When you input the number and press ENTER button, the keypad chirps at the same time, meaning it is done.
Setting Buzzer Announcement Mode (F3)
After the access to F3 function interface, the display shows the current announcement mode and you can select your desired mode:
0: OFF; 1: SLOW; 2: NEUTRAL; 3: FAST.
When you input the expected number and press ENTER button, the keypad chirps at the same time, meaning it is done.
Setting vibration mode (F4)
After the access to F4 function interface, the display shows the current vibration mode and you can select your desired mode:
0: OFF; 1: SLOW; 2: NEUTRAL; 3: FAST.
When you input the expected number and press ENTER button, the keypad chirps at the same time, meaning it is done.
You can also refer to the video at the link below.
https://www.youtube.com/watch?v=E-7ovKaQYQY
3、How to setting Alarm Time on Overstepping?
After the access to F5 function interface, the display shows the current alarm time after overstepping and you can select your desired time. When the Pager is out of transmission range of keypad for a certain length of time, it will trigger an alarm. The pager shows "99” with vibrating and blinking. The time can be set to 0-30 minutes (0 means the alarm is off. And the other number stands for the time, after which the alarm begins to go off. )
4、How to Set Service Countdown?
After the access to F6 function interface, the display shows the current service countdown and you can select your desired countdown (0-99 minutes). 0 is to turn off the function, while the other number means that the customer pager will remind the guest of collecting meals after an interval of countdown when it receives messages from the keypad. After the reminder of countdown, it is only when the customer pager is placed on the charging tray connected to power that notification is closed. When it is sending the notification, the Customer Pager is constantly vibrating and blinking and the ID of disc will be showed in the display.
5、How to Set Keypad Password?
After the access to F8 function interface, the display shows "0.0.0.0.”. To set up the password for the keypad, input four-digit number and press ENTER button. When the keypad chirps at the same time, meaning it is done. ("2580” is the default password for the keypad, which can unlock the keypad in any situation. Notice: The code can be set to "0000”. )
If you have other questions, please click here to contact us. Retekess is committed to providing you with the best products and the best service.


Comments (0)